Lego Imperial Star Destroyer (10030)
I first saw a Lego Imperial Star Destroyer at the Power House Museum during the Star Wars Magic of Myth exhibition.
Of course I immediately wanted one.
But it would take nearly two years before the dream became a reality. After much drooling over sets that went on ebay, I finally took the plunge on a buy-it-now set. I then waited the two full months for the surface mail package to arrive.
And what a package it was. According to the packing slip, 21 pounds worth of lego and cardboard. Out of the external packing box, I weighed it on an old bathroom scale, and it came to about 18 pounds.

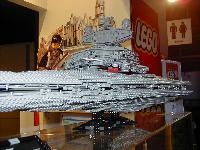
10030 box, with ruler for scale
Inside the outer box, there are four smaller boxes, stuffed full of lego, and a *massive* instruction manual - over 1cm thick!
I laid out all the baggies alongside each box:

I weighed just the Lego in the baggies - it came to 5.3 kg! (that's nearly 12 pounds!). And it took ten minutes just to flick through the instruction manual from end to end!
This site has an extremelly cool animation of the construction of the ship as recorded by a webcam every five seconds, and then put together into a four minute avi file. And this one has Darth Vader supervising gungans building it.
This is an Aussie dude who made one. This is where I found out that there are two identical copies of the internal A-frame. This guy made the two A-frames concurrently, and I decided to do the same thing. He also made the Tantive IV ship first, which I was planning to do also. And he had a good idea for making the 32 little detail strips, will probably do that too.
The beginningSo Thursday night I sat down to begin. I cleared a space on my desk, and opened the whopping instruction manual.


As you can see from the above picture, I didn't have much room to work with once the intruction manual was opened and I had the baggies of smaller pieces spread around. This is fine for working on small sections of lego, but I had real problems with the wings. I'd recommend a space three times the size of the A3-sized manual, such as a dining table.
I also kept all the Lego in the baggies they came in, and didn't empty them out. This seemed to work fairly well, once I started to remember which pieces were in which bags.
Tantive IVI began with the Tantive IV ship, thinking I'd rather finish on the big ship not the little one. The reasoning was ok, except that until I had a feel for which baggies all the pieces were in, I was doing a lot of hunting and gathering just to find the small numbers of pieces needed for the tiny ship. I would have been better off leaving it til the end I think. So as it was it took me nearly an hour to make the Tantive IV and the name plate.

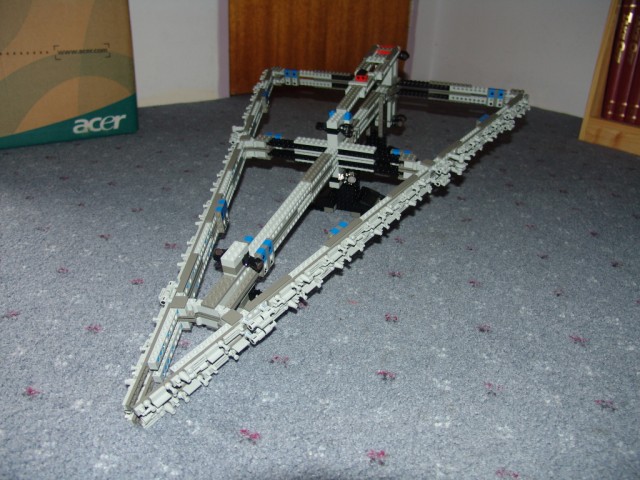
Next came the twin A-frames. Having been warned by reading other sites that there were two to make, I decided to make them simultaneously.
Fast forward to Saturday morning, 20.11.04.
I also followed this dude's suggestion of mounting the 16 (x2) identical detail panels to a lego plate and building them there.


There's a mistake in the frames when I photographed them, which I didn't discover until I went to mount the wings :)


Next came the mounting stand, which is built into the infrastructure of the ship itself for stability. Until the engines are mounted though, it's rather nose-heavy and tilts down.
Some closeups of the engines. It seems very strange making engines out of wheels and barrels.


Once attached, the whole engine structure looks like this:

I ran into space problems when I began to assemble the "wings". The table wasn't big enough to spread out the instructions next to the wings, so I was building the wings on top of the intructions. But you have to change pages every three or four pieces, before they're properly fastened, so I was constantly having to move everything and realign everything. So I gave up and moved to the floor. This presented its own problems, as the floor isn't solid, and you can't press big plates together very easily, as they just sink into the carpet.


The wings are cleverly held on by three 2x2 plates at the outer edges, and four magnets on the inner edge. So it's very easy to flip open the wings to see the interior. Not that you can flip the bottom edges very far, and another magnet or two may be useful to prevent the bottom wings just falling off.


By dinner time on Saturday I had all four "wings" completed (I wasn't working all day!). There's a gaping hole with an angled mounting frame for the rest of the ship. The mounting frame is hinged at one end, and to lift the bottom of the ship, simply lift this frame up, then stick your hand into the depths of the ship to grab hold of the chassis. It's quite sturdy and you can carry all of the ship at this stage around very easily.


Next came the "body" of the ship. This section is bristling with grilles, cones, taps, levers, clips, and right angled panels. The interior is all technic beams and pins, and lets the side parts angle down. There's also a whopping great blue tower in the middle, for lining up the bridge section with, and for use as a handle :)


Moving up, we have the back "spine" that leads up to the command decks. The command deck section is rather weird, and isn't solid, but the panels actually wiggle significantly when touched.


The command deck slots into the spine, which then slots into another layer of the body of the ship. These three components then sit atop the main body.
CompletionWhen I'd finished, I ended up with the standard number of extra pieces, as well as one extra wing. So I poked my head around the superstructure (fortunately it's perfectly symmetrical) and finally found where I'd forgotten to attach it. I also ended up with four extra magnets, which aren't listed on Peeron as being extra. But there were no mounting brackets, so I guess those must be spares also.
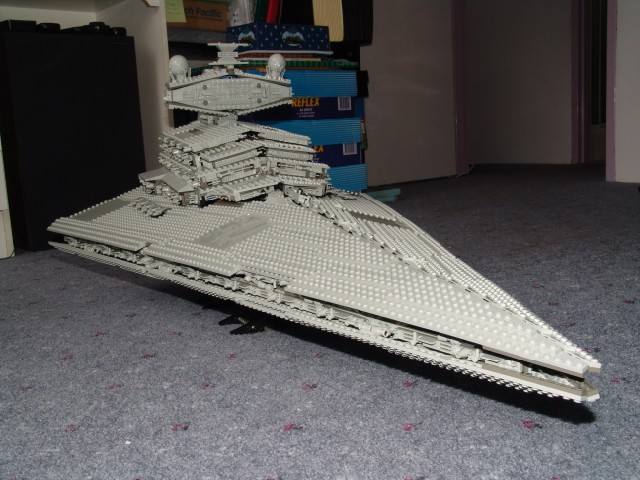
And so twelve hours after I began, we have the Imperial Star Destroyer.


I spent very approximately 12 hours building this set:
Tantive IV and name plate: 1 hour
A-frame structure: 1 3/4 hours
A-frame detail: 3/4 hour
Frame attachment and stand: 3/4 hour
Engines: 1/2 hour
Wings: 3 1/2 hours
Main body: 2 1/4 hours
Spine: 1/4 hour
Command deck: 3/4 hour
Last layer of body: 1/4 hour
And definitely worth it :)
Had various friends and kids over to have a look at it today (Sunday). Although the kids were far more interested in playing with the Harry Potter lego I had out. Oh well :)